1 PLAN & MEASURE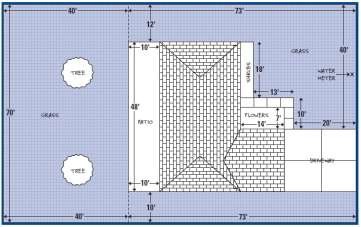
- Using the grid graph paper provided measure your property boundaries. Add in an outline of your home, driveway,
- paved areas, pool trees and any other fixed structures.
- Mark on your drawing the location and type of water supply you will be connecting to i.e. garden tap, mains service or tank.
- Measure and identify the different areas you wish to water – lawn, shrubs, garden beds and any other areas that may need watering.
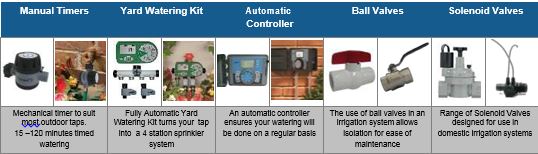
- Confirm the type of control system your require – Manual or Automatic (If automatic confirm available power source for position of controller)
2 FLOW TEST AND PRODUCT SELECTION
- Calculate your design water flow – refer to Water Capacity flow test.
 Water capacity determines the size of your system – How many sprinklers you can run at the one time depends on how much water you have available.
 - Decide which irrigation method best (sprinkler selection) suits the areas you want to water – Spray pop-up, Rotors or Drip. Refer to your Product Selection Guide.
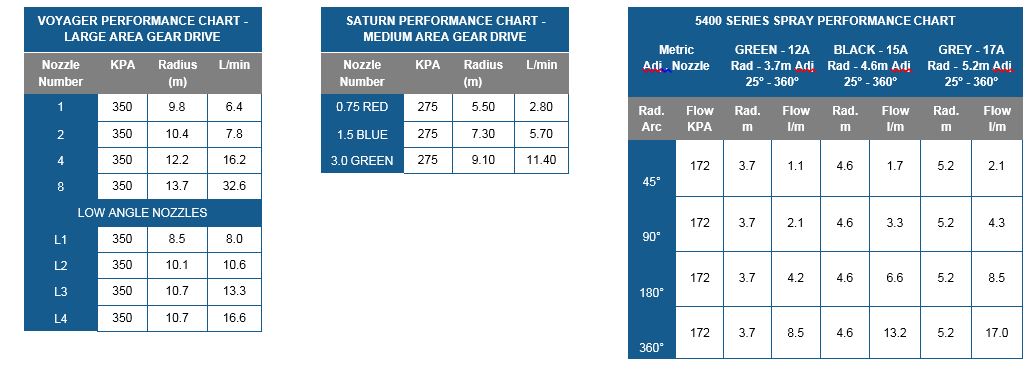
- Layout sprinklers on plan, start with part circle sprinklers which throw away from the house, driveway, fences and other boundaries, then plot the full circle sprinklers. Ensure you are achieving a head to head coverage by using the Performance Charts. (Sprinkler spacing should be set to achieve sprinkler to sprinkler coverage).
- Identify your irrigation zones based on your watering capacity flow test. Calculate your total water usage per zone by using your sprinkler flow charts e.g. 4 x 5415A uses 26.4lpm in a half circle pattern.
- If you have decided to go with an automatic watering system you will require a sprinkler timer, solenoid valves and cable. Cable is required to run between solenoid valves and the controller. The cable only carries 24 volts so it is easy to do yourself. Cable sizes are determined by the distance between the solenoid valves and the controller e.g. 0.5mm² maximum distance 100m. Cables should be layed in the trenches with pipework, and wire joints should be connected with waterproof electrical cable connectors.
-
Note: Do not exceed design flow capacity, larger areas may need to be broken into more than one zone.
WATER CAPACITY FLOW TEST
|
|||||||||||||||||||||||||||||||||||||
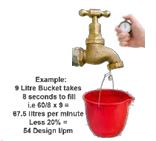
This simple bucket test can be measured by timing in seconds how long it takes to fill a 9 litre household bucket. Important points –
– Testing should be done at times when you plan to run your system (i.e 6.00am)
– Do your bucket test closest to the water meter
– Ensure all other taps are turned off
– Take 20% of the flow to allow for friction loss and pressure variances in main lines
3 DESIGN & LAYOUT
Sprinkler Performance Charts